Linking Google Analytics
By using Google Analytics metrics to enrich records your crawler extracts from a site, you can make your search more relevant.
The following steps show how to configure your crawler to integrate Google Analytics data automatically:
- Provide read access to Google Analytics data
- Create a new external data source
- Test your external data
- Update your crawler configuration
- Integrate Google Analytics metrics into your records.
Provide read access to Google Analytics data
The administrator of your Google Analytics account must provide read access to the email address of the Google Account you want to use (a personal account or service account).
- Sign in to Google Analytics.
- Select Account, Property, and then the View that contains the analytics for the site you’re crawling.
- Go to the Admin tab.
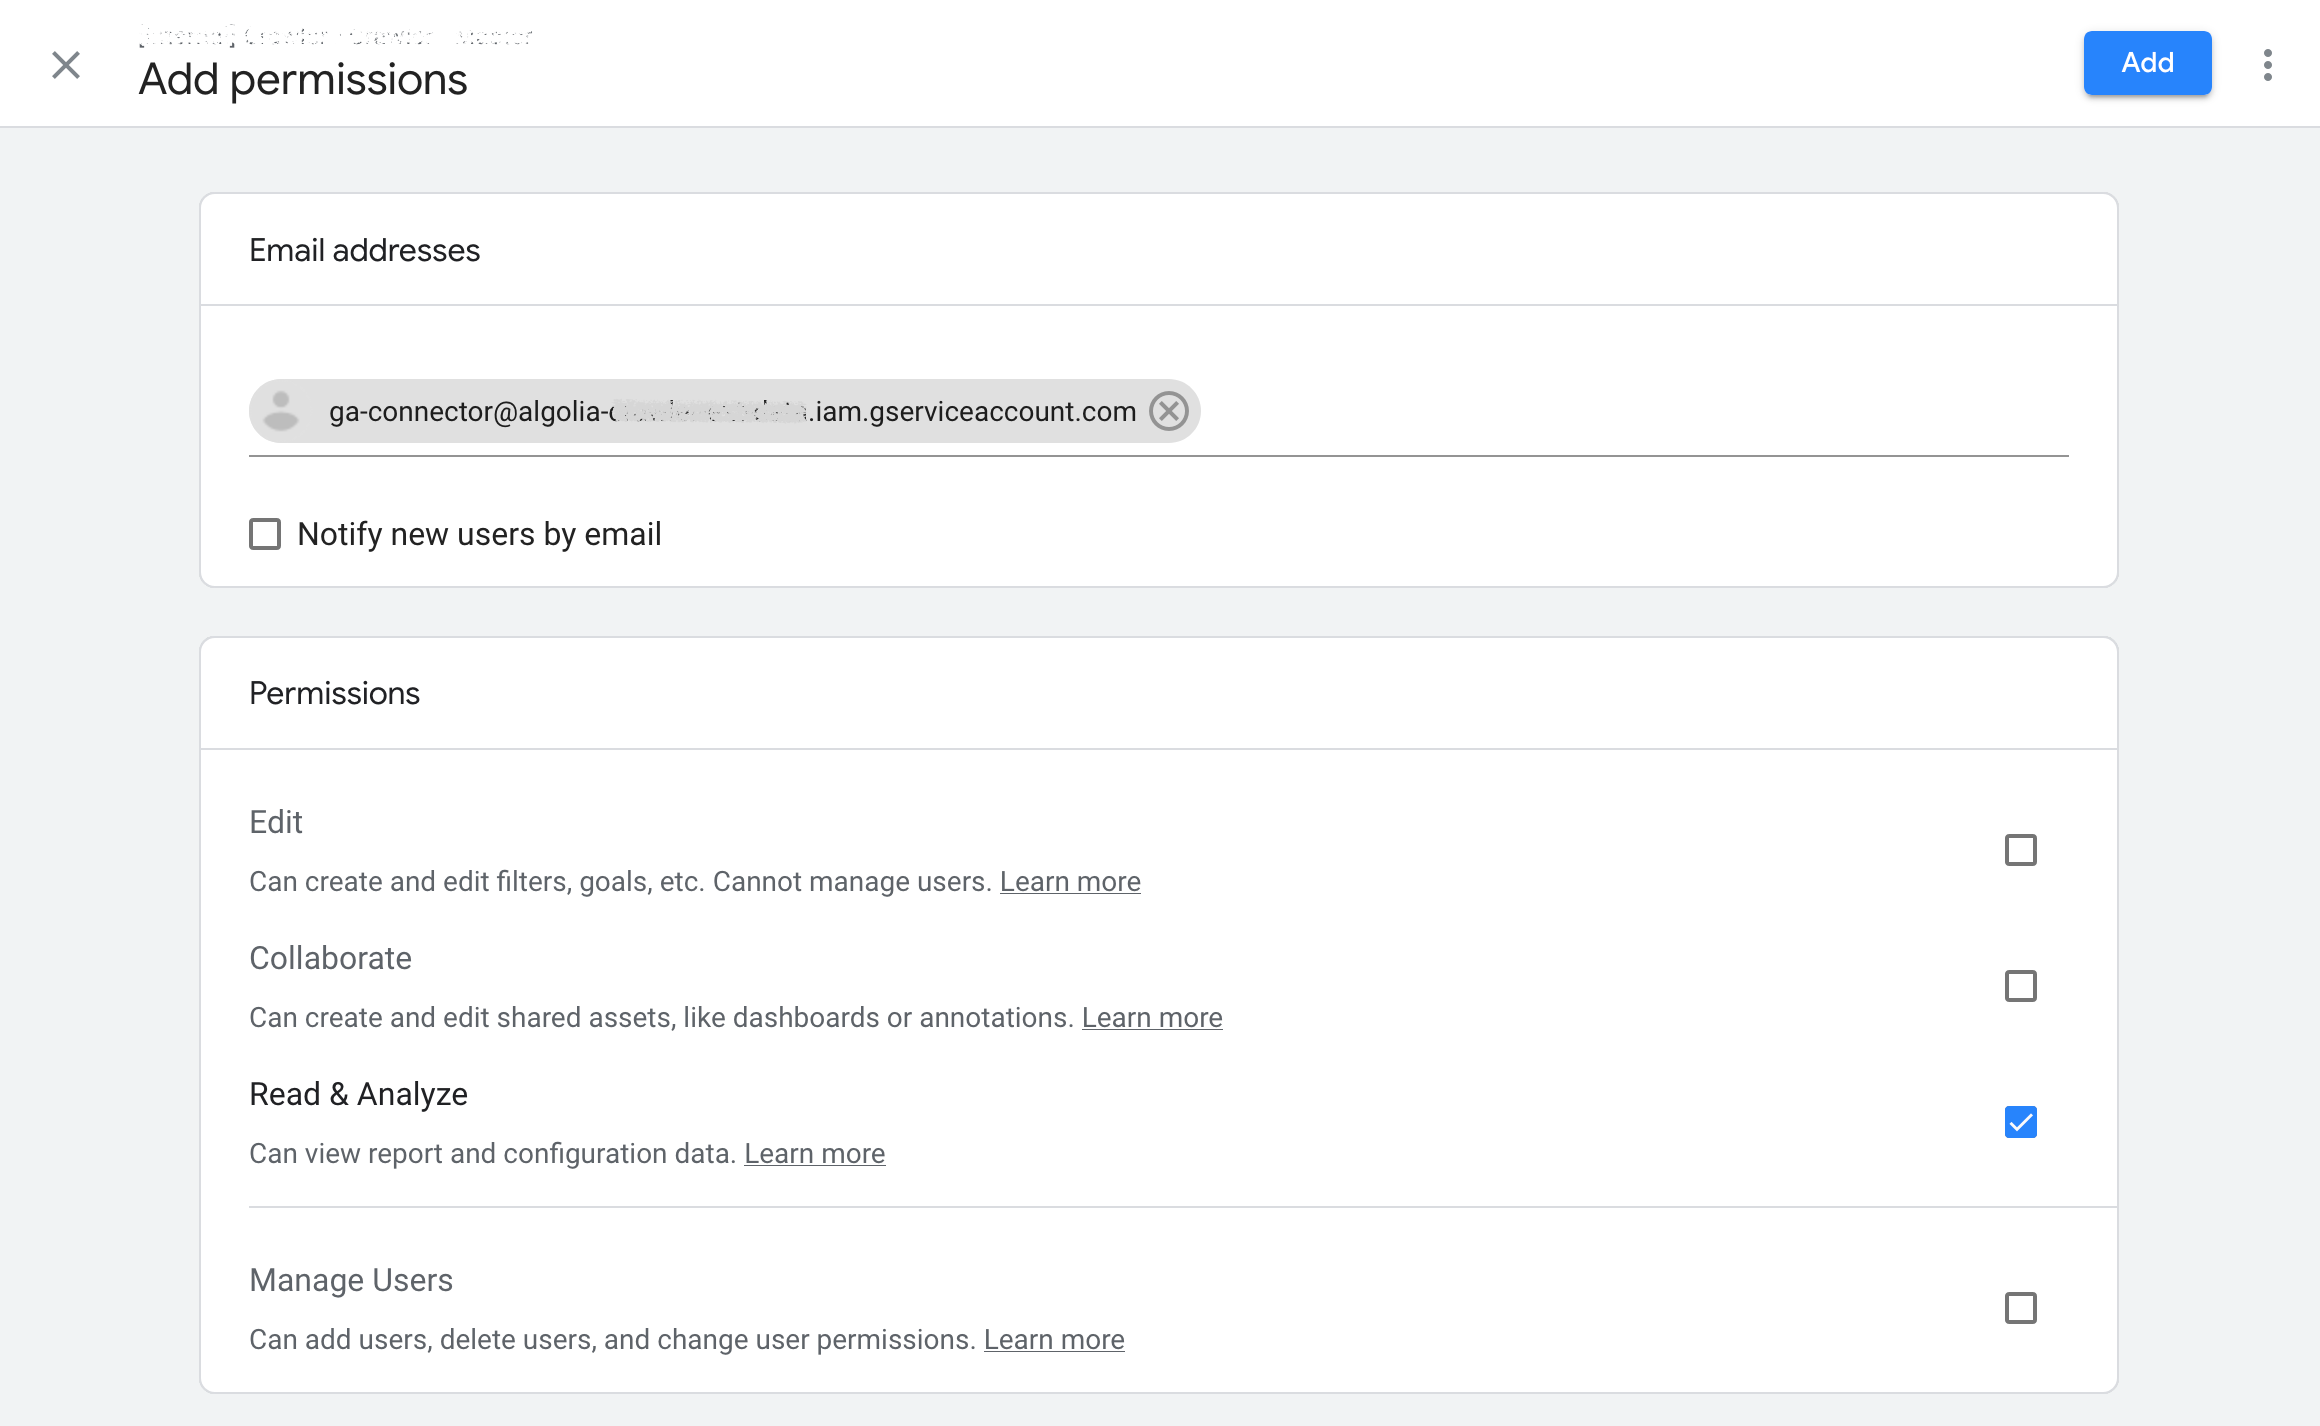
- In the Properties panel (on the left side of the screen), click Properties Access Management.
- Click the + button, then click Add users.
- Paste the email address of the Google Account you want to add.
- In the Permissions panel, ensure that only the “Read & Analyze” permission is enabled.
- Click Add to confirm.
Create a new external data source
- From the Crawler page, select the External Data tab.
- Click Add External Data.
- Fill in the form:
- App ID: specify the application ID to associate with the external data.
- Unique name: the name used to reference this external data in your crawler’s configuration (unique within the scope of the selected App ID).
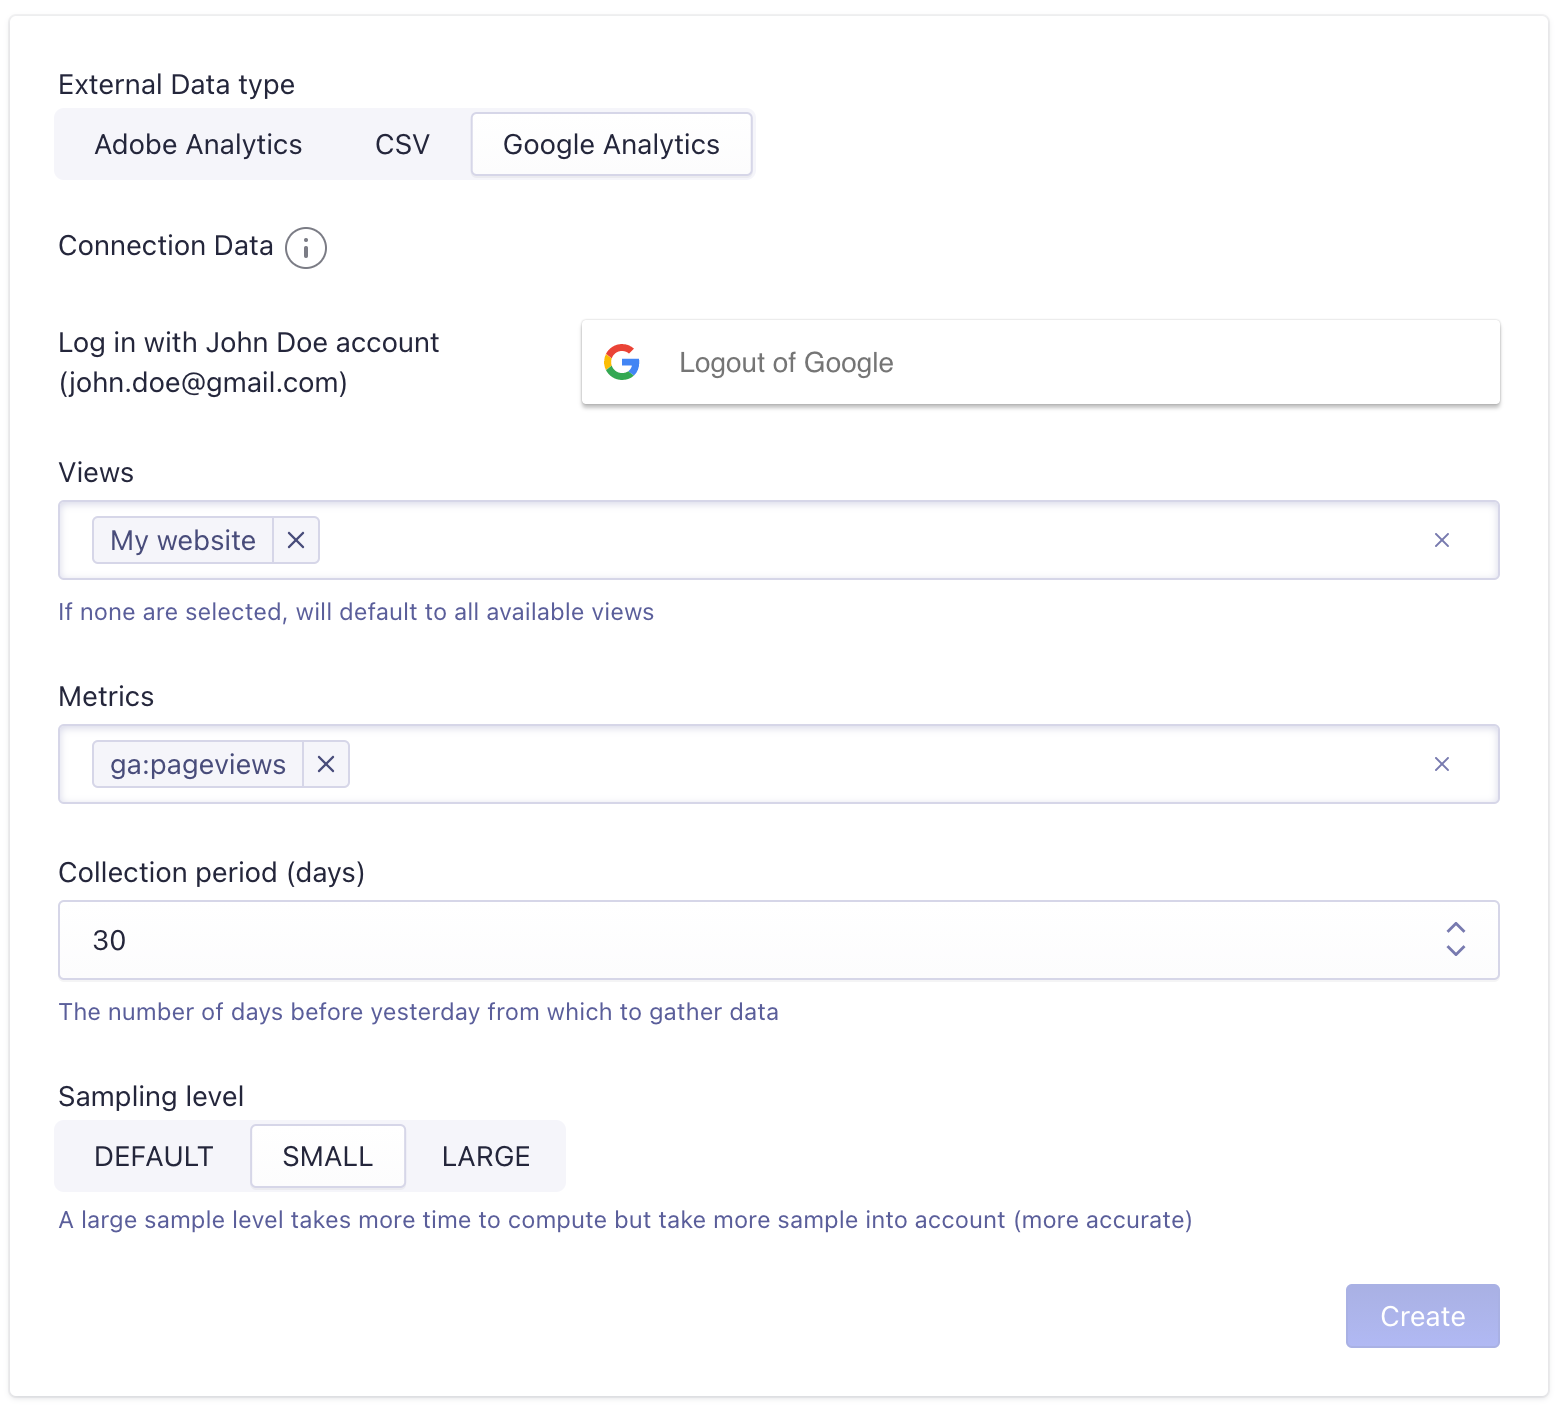
- External Data type: select Google Analytics.
-
Connection Data:
- Click Sign in with Google to authenticate with Google OAuth.
- Optional: to use a service account, click Sign in with email and private key instead.
- Views: select properties to fetch data from. By default, all available properties are selected.
- Metrics: select one or more metrics to fetch.
-
Collection period: the number of days, starting from any point before yesterday, to use for gathering data.
Optional: create a service account
If you don’t want to link a personal account, you can create a service account on Google Cloud.
- Create (or select an existing) project from the Google Cloud developer console.
- Activate the Google Analytics Data API and the Google Analytics Admin API in that project.
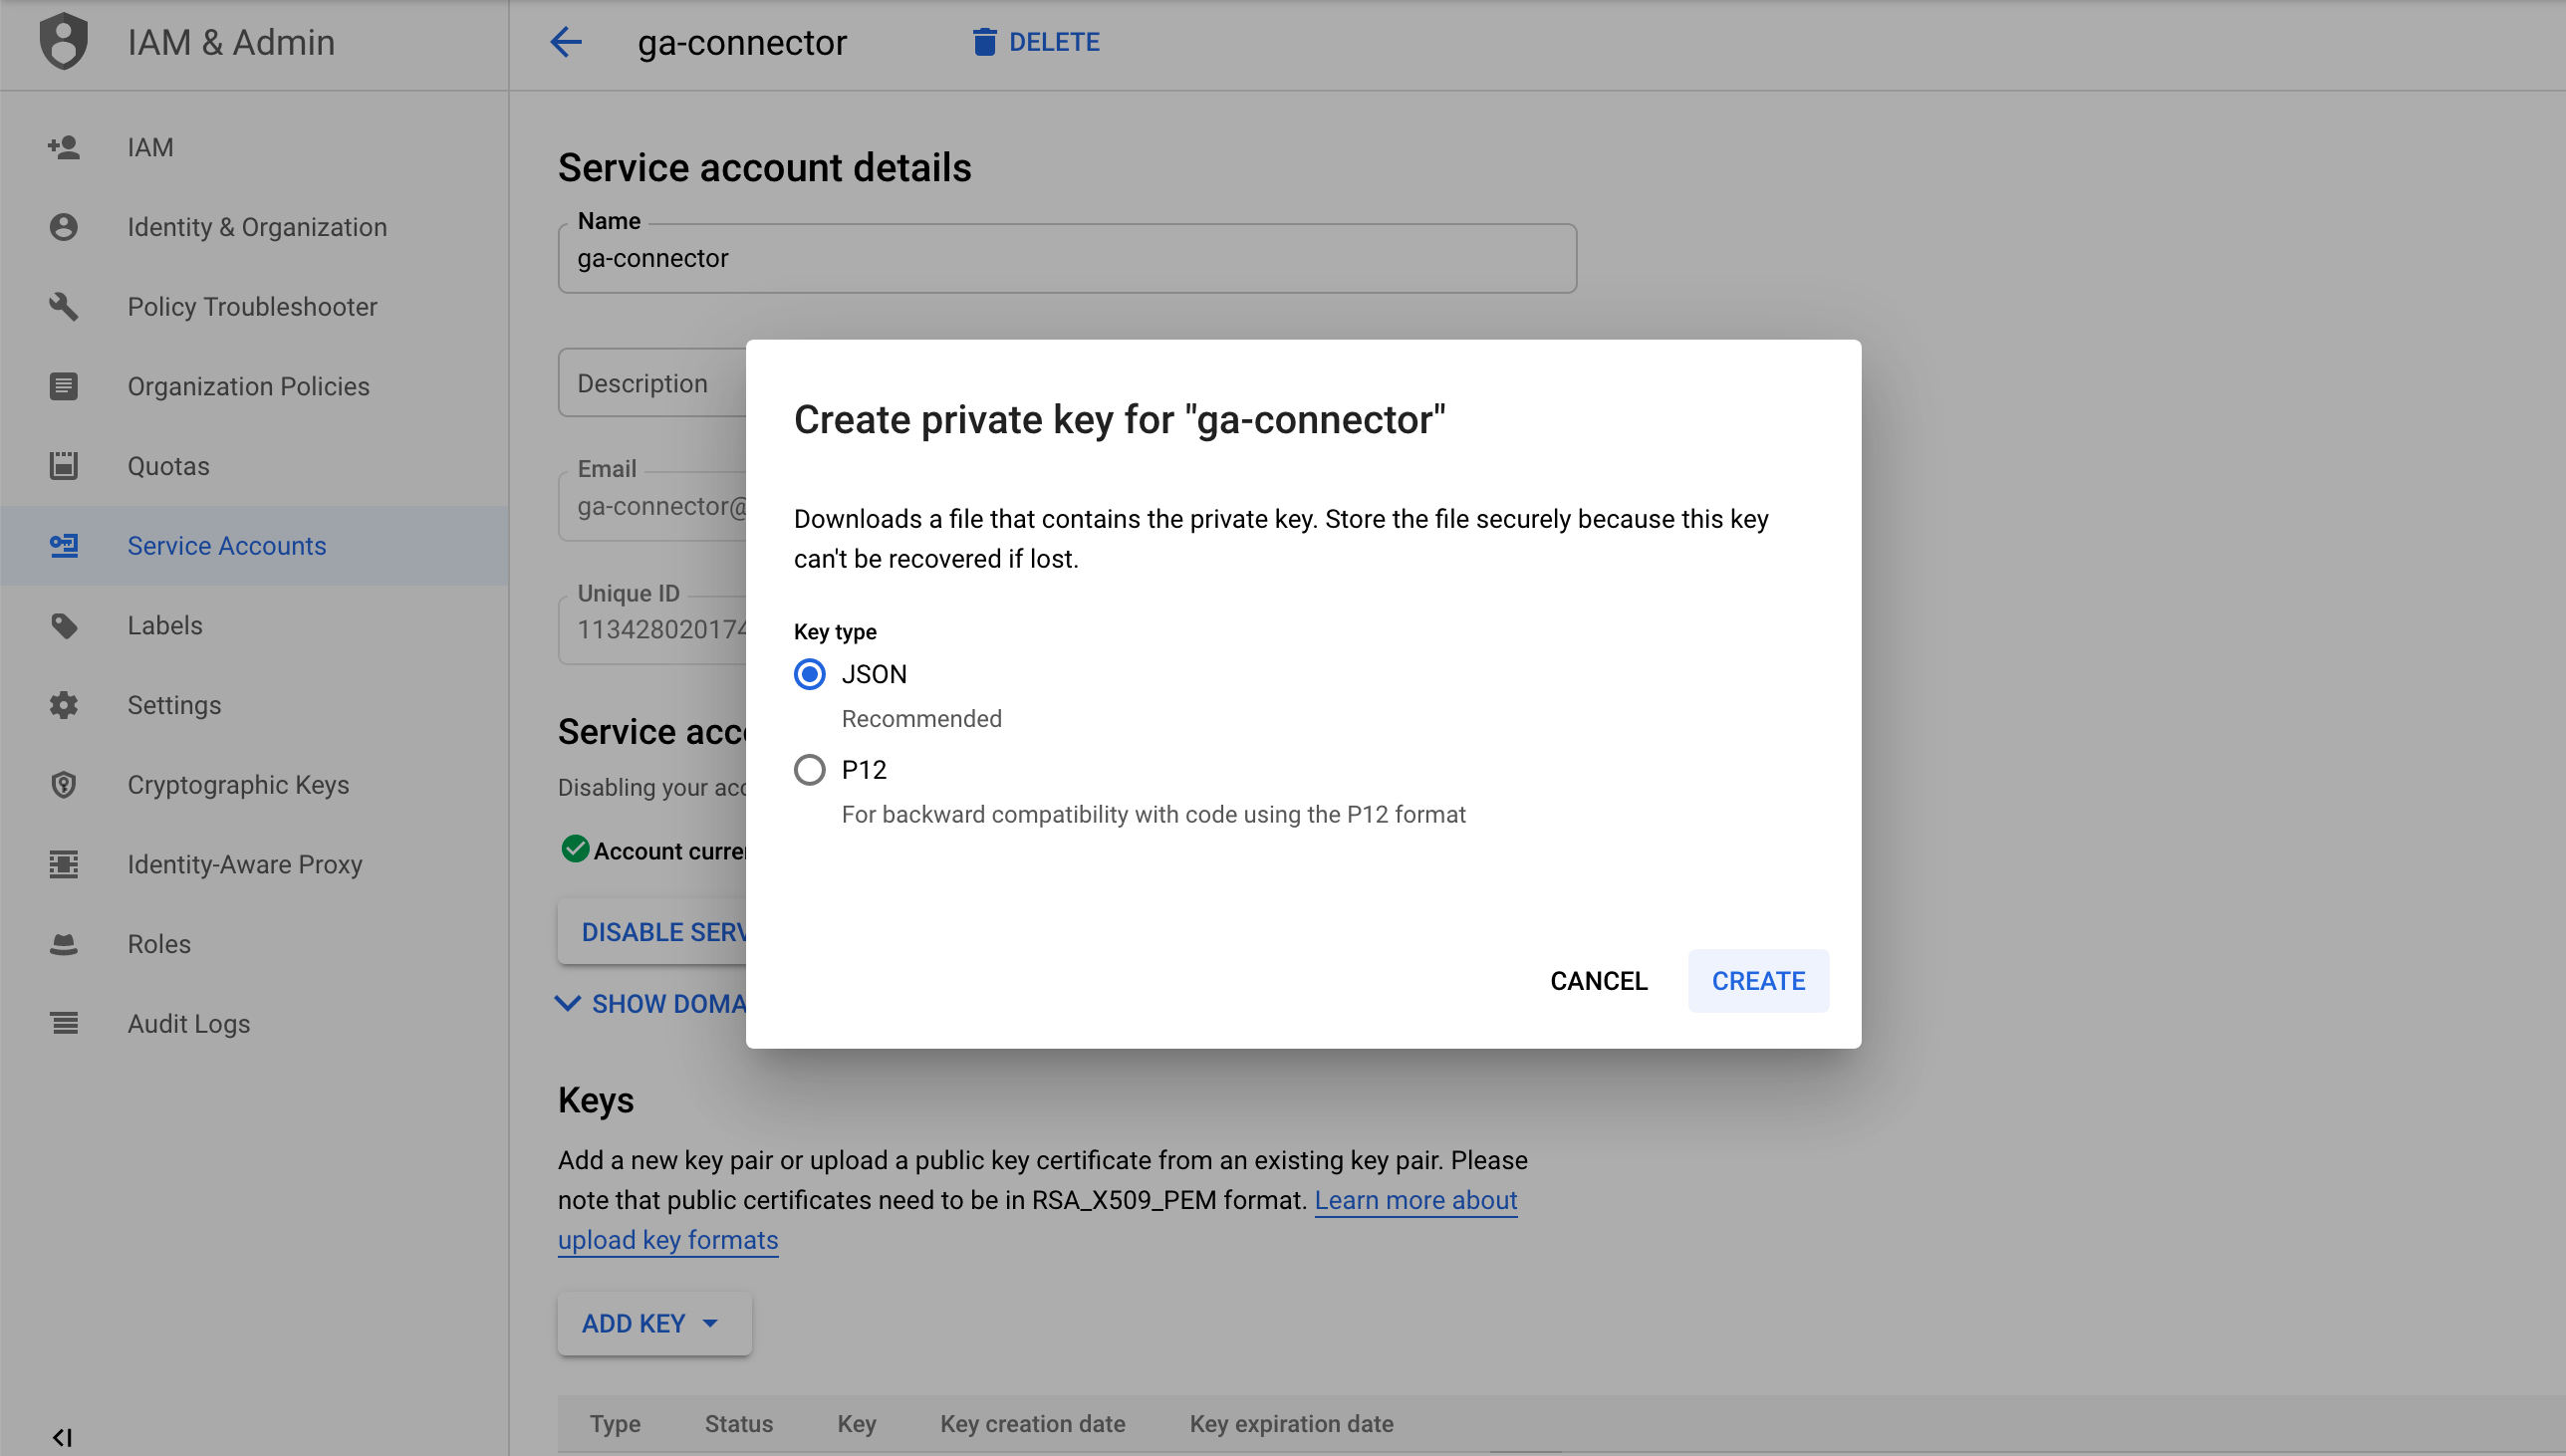
- In the Credentials section, create a new service account. Skip all the optional steps.
- Open the service account and click Add key -> Create new key. Select JSON and download the resulting file (you need this file to update your crawler configuration).
Test your external data
Verify that your crawler can connect to your Google Analytics property:
- From the Crawler page, select the External Data tab.
- Click the looking glass icon to the right of your external data source to go to the Explore Data page.
- Trigger a manual refresh with the Refresh Data button and verify that the extraction is successful by checking the Status on the rightmost column. If it’s green, it’s all good.
If you use a service account and see errors, check your credentials.
Update your crawler configuration
Edit the crawler configuration to use the external data you created:
- Go to the Crawler editor.
- Add the unique name of the external data to your
externalDataproperty:
externalData: ['myGoogleAnalyticsData']
- Save your changes.
After saving your crawler configuration, your Google Analytics metrics will be ready whenever you crawl your site.
If an error occurs while fetching your analytics, it will appear less than one minute after the crawling process starts.
You must crawl your site at least once before the metrics will appear.
Integrate Google Analytics metrics into your records
Edit your recordExtractor so that it integrates metrics from Google Analytics into the records it produces:
- Go to the Crawler editor.
-
Read metric values from the external data source you’ve added beforehand, and store them as attributes for your resulting records. If Google Analytics has data for the current page, the associated metrics should be present in the
dataSourcesparameter of yourrecordExtractor:Copy1 2 3 4 5 6 7 8 9 10 11 12 13 14
{ // ... recordExtractor: ({ url, dataSources }) => { // "myAnalytics" must match one of the unique name defined in `externalData` const screenPageViews = dataSources.myAnalytics['screenPageViews']; return [ { objectID: url.href, screenPageViews, }, ]; }, };
For a complete example, check the recordExtractor of the sample Google Analytics crawler configuration.
- In the Test a URL field of the configuration editor (which you can find in the Admin > Settings tab), type the URL of a page with analytics attached to it.
- Click Run test.
- When the test finishes, go to the External Data tab. You should see the data extracted from Google Analytics for that page.
If this doesn’t work as expected, try adding a trailing / to your URL or test with another URL.
